
The E-M1 rear dial is a known issue (hope they fixed it with the mk II) that doesn’t function very well or just inconsistent. I discovered that it could very likely be due to the lack of sealing on that dial. So, be it ‘brute force’ method (keeps on dialing until the electronic contacts were cleaned) or switching between different shooting modes to change settings you wanted, I have been living with the E-M1 with this issue long enough until I was trying to shoot the supermoon last few days, you know, moon moves really fast and I simply have no time to use any of the 2 methods. Frustrated, it’s time for a more permanent solution!
First, special thanks to Kevin Darras who made an E-M5 disassembly guide video, I had the same struggle like him of not finding any tips/guide on the disassembly. I thought the E-M1 wouldn’t be much different than the E-M5 after all the engineers were improving on the existing design. His video helped me understood some constructions of the Olympus and gained some confidence.
Second, disclaimer, before you follow this guide, I would assume that you have at least some camera repair/disassembly experience, I would hold no responsibility if you damage your camera in the process. I am just sharing some tips!
Third, you would need some kind of solvent/cleaner. I used the Threebond spray cleaner for the job. I assume you have the rest of the standard tools so I won’t have to mention. (Threebond should be paying me for the free advertising).
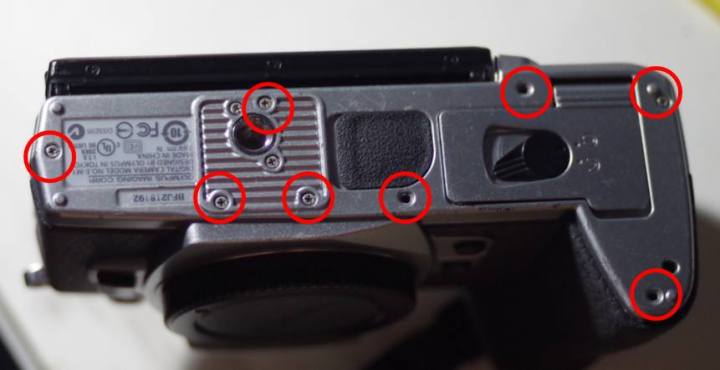
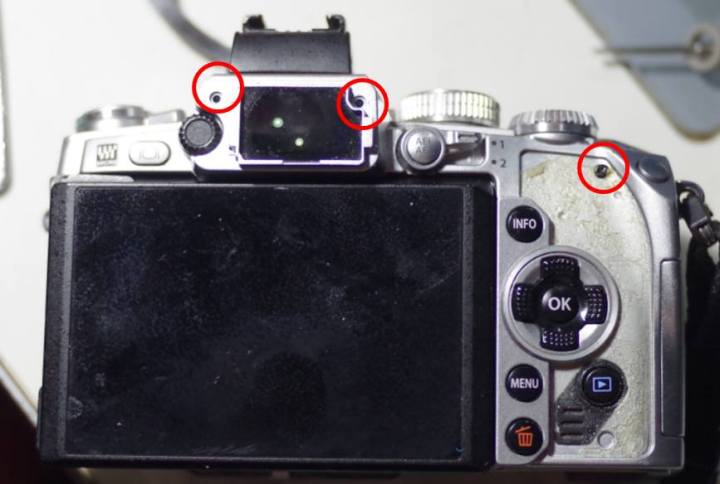
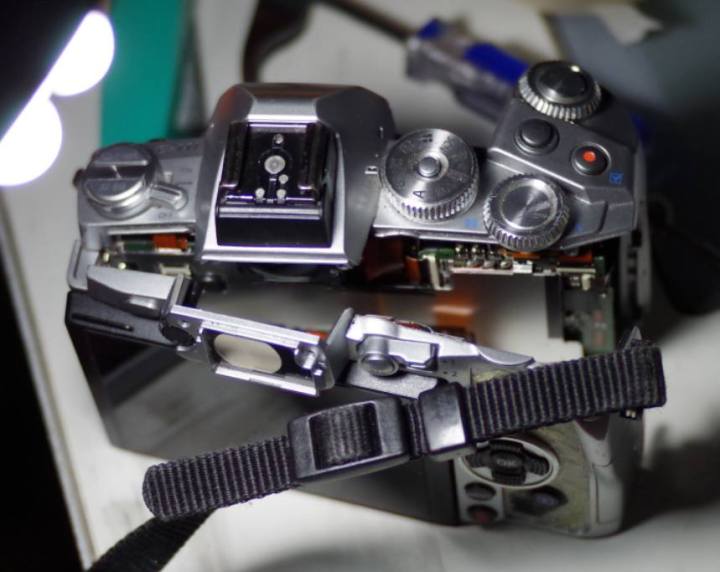
Let’s begin. The idea is to remove the rear plate (no de-soldering required), access the rear dial, spray the cleaner into it and turn it a bit.

That’s all! Skip what the repairshop may quote you for the disassembly. In fact, I sprayed the cleaner without opening up the case a long time ago, sometimes it works for a short while, but the dirt/mold/whatever seems to ‘grow back’ and cause the issue again. So I am not 100% certain that this cleaning method will last forever. Hell, the fact that I could spray from the exterior explained that it is not weatherseal!
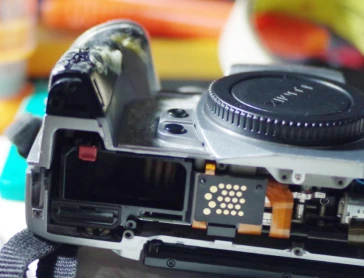
Another thing that bugged me after removing the bottom plate: I owned the previous model E-M5, I love that camera, also slightly smaller and lighter than E-M1. I thought E-M1 has a good justification with the extra electronics they might squeeze into the micro 4/3 body and for the extra hand grip but…
Oh well, that’s all! Hope you find this useful.

Totally useful. Thanks for that. Very simple fix and the rear dial now work perfectly. I suspect that the replacement dial that Olympus would install is the same as the original one anyway, so I am stoked I learned how to clean it.
cheers
Thank you for sharing this! Did it fix the problem for good or did you have to re-apply the procedure repeatedly?
Good question, the problem did recurred, however the recurrence is pretty mild and I could live with it since I posted until today. So the answer is, no I have not yet repeat the procedure.
Thanx for the great manual. My camera has the same issue and want also to fix it. Would you pleasetell me the exact name of the product that you had used? I found some Threebond Cleaner Spray, but it was advertised to use it for cleaning car brakes. Kind regards!
hello, as mentioned I really don’t want to specify any brand of cleaner.. theoretically any solvent/degreaser should work. in this case the three bond brakes cleaner works for me!
thanks for this good guide-line. After this guide line i could fixed the losen strap holder on the right side.
Thanx
I would most definitely stick to professional, no-residue electrical contact cleaning sprays. Red DeOxit in particular is not the best as it does leave a residue that after time becomes worse. And by all means be sure to work the dial a LOT while wet with the cleaner before it evaporates.
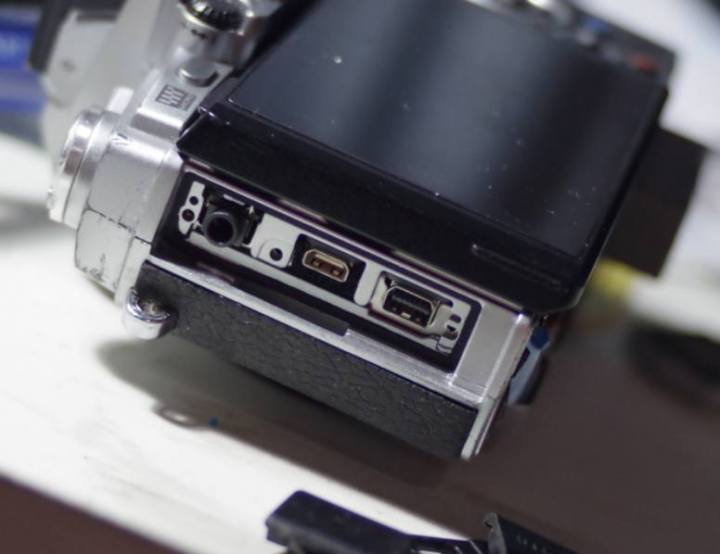
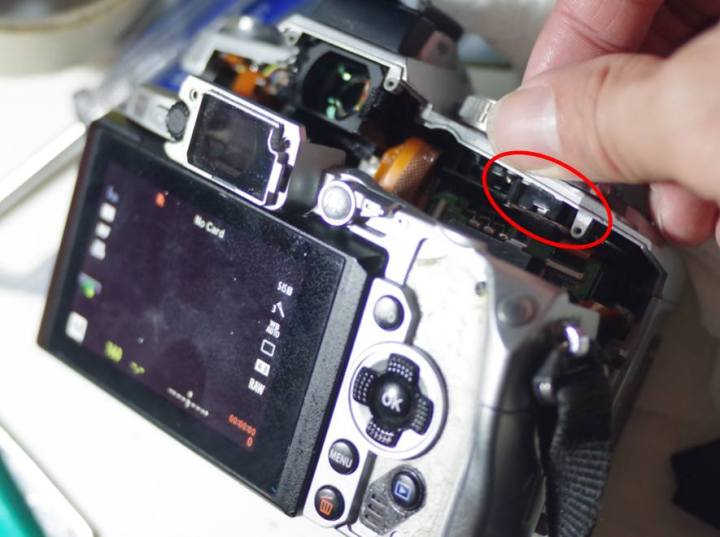
And yes, you DO need to remove the screws and plastic plate and flaps at the HDMI and Mic In area.
Thanks for this guide. I think it’s working for the moment. Wasn’t too hard either.
Just be very organized with screws when you lay them down on a cloth next to you. And I recommend a magnetized screwdriver for this kind of work. And keep it away from your screws that are removed and organized. They leap toward magnets.
Brad
And also, I did NOT remove the rubber grip material, I merely peeled them back where needed and they went back pretty well afterwards.
B
My problem is that I bought item very cheap and used. When I peeled back rubber off, I noticed that someone has been making fixes with it and probably damaged back plate screw. So there are some epoxy attachments that prevent removal of back plate. I was wondering if you could drill a tiny hole there and spray cleaner through it, but I’m afraid that during drilling metal flakes spread all over the interior of camera and make things worse.
These instructions are perfect, just performed the cleaning as my dial didn’t respond at all (usually it came back to life after some back and forth exercises but not any longer). It now works like new, thanks a lot for the description and the photos. (I did notice there were different length screws, you should pay attention to which one came from where 🙂
I have an EP5 camera with the same problem on both dials. I used CRC electrical contact cleaner directly sprayed under each dial. It improved the problem somewhat and didn’t harm the camera.
Thank you so much for this. Olympus quoted £168 (inc VAT) I bought the contact spray for less than £10 and used about 1 hour of concentration based on your guide for free!
thank you very much for the instructions, I have just repaired my M1
\(٥⁀▽⁀ )/
well…I repaired the dial…but lost the tactile screen 😦 …I was very careful with the ribbon cables and connectors and all look good, screen works, it is just the tactile…any ideas?
How did you get the rear plate off? I removed every screw I could find, but the left side of the rear plate seems to not budge (the side with the ports). Seems like there’s still something holding them there.